Showing posts with label Singapore. Show all posts

Tuesday, March 23, 2010

Understanding Automatic Fire Sprinkler (Wet) System Drawings (Singapore)

  • စကာၤပူ မွာ Automatic Fire Sprinkler System Drawing ေတြ ကို ေလ့လာတဲ့ အခါ အေထာက္အကူ ျဖစ္ေစႏိုင္ဘို႔ ရည္ရြယ္ပါတယ္။ (M'sia, Australia & U.K အတြက္ လည္း အေထာက္အကူ ျဖစ္ပါလိမ့္မယ္။)


  1. System Operation and Components

    • Wet pipe installation : sprinkler bulb ကြဲတဲ့ အခါ အဆင္သင့္ ပန္းထြက္ႏိုင္ေအာင္ Pipework ထဲမွာ Pressurized-Water (ဖိအား) နဲ႔ ေရျဖည့္ထား တဲ့ Installation ျဖစ္ပါတယ္။
    • အမ်ားဆံုး ေတြ႕ရေလ့ရွိတဲ့ Wet pipe installation Typical Arrangement ပံုစံ ကို ေအာက္မွာ ေဖာ္ျပထားပါတယ္။ (ပံု ကို အႀကီး လိုခ်င္ရင္ ပံုေပၚ Mouse ေရႊ႕ၿပီး Link ကို ဖြင့္ပါ။)


    • အလုပ္လုပ္ပံု ကေတာ့
      1. ပံုမွန္ အေျခအေန

        • Pipe ေတြ ထဲမွာ Pressure နဲ႔ ေရျဖည့္ထားပါတယ္။ ေရယိုစိမ့္တဲ့ အခါ ဒီ Pressure ကိုထိန္းထား ႏိုင္ဘို႔ အတြက္ Pressure Maintenance Pump (Jockey Pump)(17)က အလိုလို အလုပ္လုပ္ ေနပါမယ္။

      2. အေရးေပၚ အေျခအေန

        • တစ္ေနရာရာ မွာ မီးေလာင္တဲ့ အခါ အဲဒီ့ေနရာ မွာ အပူခ်ိန္ တက္လာပါၿပီး နီးစပ္ရာ Sprinkler Head (26)ကို ကြဲေစပါမယ္။ အဲဒီ့ ကြဲသြားတဲ့ Sprinkler ကေန ေရေတြ ပန္းထြက္လာပါမယ္။
        • ဒီအခါ ဒီ Sprinkler ကို ေပးထားတဲ့ Pipe Network ထဲမွာ ေရစီးပါမယ္။ Pressure လည္းက်လာပါမယ္။
        • ေရစီးတဲ့အတြက္ ဒီ Pipe Network နဲ႔သက္ဆိုင္တဲ့ Flow switch (24)ကေန Fire Alarm Signal ေပးပါမယ္။ (ဒီ Signal က ဆက္ထားတဲ့ Fire Alarm System ကိုသြားၿပီး အျခား Emergency Systems ေတြ ကို Automatically Activate လုပ္ပါမယ္။
        • Pressure က်လာတဲ့ အခါ Sprinkler Control (Alarm) Valve (20)အလုပ္လုပ္ ပါမယ္။ ေရအားနဲ႔ အလုပ္လုပ္ တဲ့ Alarm Gong (22)က ေန မီးလွန္႔သံေခ်ာင္း သံ (ေခါင္းေလာင္းအဆက္မျပတ္ တီး) ပါလိမ့္မယ္။
        • ဒီလို Sprinkler ကြဲလို႔ System Pressure က်လာရင္ Duty Pump (14)က ခ်က္ခ်င္း (30s အတြင္း) အလိုလို Automatically Operate လုပ္ရပါမယ္။ Duty Pump က အေၾကာင္းတစ္ခုခု ေၾကာင့္ Operate မလုပ္ႏိုင္ပဲ Fail ျဖစ္ခဲ့ရင္ Standby Pump (9)က အလိုလို တာဝန္လႊဲ ယူရပါမယ္။ ဒီလို အေျခအေန ေတြ ကိုရဘို႔ အတြက္ Control Panel (/w Emergency Power Supply)(19) ကို ဒီဇိုင္း လုပ္ထားရပါတယ္။
        • Storage Tank (1)က မီးသတ္ဘို႔ လိုအပ္တဲ့ ေရပမာဏ ကို သိုေလွာင္ထား ရပါတယ္။
        • လိုအပ္ရင္ Fire Engine (မီးသတ္ကား) ကေန Sprinkler System ထဲကို အျပင္ကေန ေရျဖည့္ခြင့္ရေအာင္ မီးသတ္ကား ဝင္လို႔ လြယ္တဲ့ ေနရာ အေဆာက္အအံု ရဲ့ အျပင္ဘက္ မွာ Breeching Inlet (2) ကို ထားေပးရပါတယ္။

      3. Testing and Maintenance

        • အေရးေပၚ အေျခအေန အတြက္ တပ္ဆင္ထား တာမို႔ အေရးအေၾကာင္း မွ ပ်က္ေနတာ မျဖစ္ဘို႔၊ အၿမဲတမ္း အဆင္သင့္ ျဖစ္ေနတာ ေသခ်ာဘို႔ အတြက္ ထိန္းသိမ္းမႈ၊ စစ္ေဆးစမ္းသပ္ မႈေတြ လုပ္ရပါတယ္။ ဒီလို လုပ္ႏို္င္ဘို႔ အတြက္ လိုအပ္တဲ့ Test Valve လို Fittings ေတြ ကို ထည့္ထားေပးရပါတယ္။


      4. System Components

        1. Water Incoming Pipe: Storage Tank ထဲကို ေရထည့္ေပးမဲ့ ေရအဝင္ ပိုက္ပါ။ In-Flow Requirements ကိုလိုက္ၿပီး Pipe Size ကို ေရြးခ်ယ္ထားရပါတယ္။
        2. Breeching Inlet(2): အေရးေပၚ အေျခအေန မွာ မီးသတ္ကား (သို႔) Fire Engine တစ္ခုခု က ေနတစ္ဆင့္ Sprinkler System ထဲကို ေရေမာင္း ထည့္ေပးႏိုင္ဘို႔ အတြက္ ထားေပးရတဲ့ Fitting ပါ။
        3. Water Tank(1): အေရးေပၚ အေျခအေန မွာ Sprinkler System အတြက္ လိုအပ္မဲ့ ေရပမာဏ ကို သိုေလွာင္ထားဘို႔ အတြက္ပါ။
        4. Pump Sets (Duty, Standby, Jockey)(14)(9)(17): System ထဲကို ေရေမာင္းသြင္းဘို႔ ပါ။ Sprinkler ကြဲလို႔ System Pressure က်လာရင္ Duty Pump က ခ်က္ခ်င္း (30s အတြင္း) အလိုလို Automatically Operate လုပ္ရပါမယ္။ Duty Pump က အေၾကာင္းတစ္ခုခု ေၾကာင့္ Operate မလုပ္ႏိုင္ပဲ Fail ျဖစ္ခဲ့ရင္ Standby Pump က တာဝန္လႊဲ ယူရပါမယ္။ Jockey Pump ကေတာ့ ပိုက္ထဲ ကေရ စိမ့္ထြက္တာ ကို make-up (ျပန္ျဖည့္) ေပးၿပီး System ထဲမွာ Water Pressure ကိုထိန္းထားေပးဘို႔ ျဖစ္ပါတယ္။
        5. Control Panel (/w Emergency Power Supply)(19): Sprinkler Pumps ေတြ ကို ပါဝါ ေပးဘို႔ နဲ႔ ထိန္းသိမ္းေမာင္းႏွင္ ေပးဘို႔ပါ။ Emergency Power Supply ကေန ယူသံုးရပါတယ္။
        6. Pump Start Test Pipe(18): အေရးေပၚအေျခအေန မွာ Sprinkler Pumps ေတြ အဆင္သင့္ ျဖစ္ေစႏိုင္ဘို႔ အတြက္ Sprinkler ကြဲရင္ထြက္မဲ့ ေရ ကို ဖြင့္ထုတ္ေပး ၿပီး Pump ေတြ အလိုလို အလုပ္လုပ္မလုပ္ စမ္းသပ္နိုင္ဘို႔ပါ။
        7. Sprinkler Control (Alarm) Valve (20)နဲ႔ တြဲၿပီး Test Valve Assembly ကို ထားေလ့ ရွိပါတယ္။
        8. Sprinkler Control (Alarm) Valve(20): Sprinkler ကြဲလို႔ System Pressure က်လာရင္ Valve ကို ဖြင့္ေပးဘို႔ နဲ႔ တစ္ၿပိဳင္တည္းမွာ ပဲ ေရအားနဲ႔ အလုပ္လုပ္ တဲ့ Alarm Gong (22)က ေန မီးလွန္႔သံေခ်ာင္း သံ (ေခါင္းေလာင္းအဆက္မျပတ္ တီး) ပါလိမ့္မယ္။
        9. Flow Switch(24): ေရစီးတဲ့ အခါ Alarm Signal ေပးဘို႔ပါ။
        10. Pipe and Fittings: လိုအပ္တဲ့ Sprinkler Heads ေတြ ဆီ ေရပို႔ေပးနိုင္ဘို႔ပါ။
        11. Sprinklers(26): မီးေလာင္ရင္ အလိုလို ကြဲၿပီး ေရျဖန္းၿငိမ္းသတ္ ေပးႏိုင္ဘို႔ပါ။
        12. Sprinkler Drain Valve, Pipes(25): Maintenance အတြက္ပါ။
        13. Air Release Valve(27): ေလခို ႏိုင္တဲ့ ေနရာေတြမွာ ခိုေနတဲ့ ေလကို ထုတ္ပစ္ဘို႔ အတြက္ ပါ။ ေရပိုက္ထဲ မွာ ေလခိုေနရင္ လိုအပ္တဲ့ Water Flow ရဘို႔ ကို အေႏွာင့္အယွက္ ေပးႏိုင္ပါတယ္။


  2. Understanding Automatic Fire Sprinkler System Drawings

    • ေလ့လာမယ္ ဆိုရင္ လိုအပ္မဲ့ အေျခခံ Drawings ေတြ ကေတာ့။
      1. Overall Schematics,
      2. Notes, Legends & Abbreviations
      3. Floor Plans
      4. Standard Details
      (စိတ္မေကာင္းစြာ နဲ႔ ေျပာရမွာ ကေတာ့ စာေရးသူမွာ ေလာေလာဆယ္ တင္ေပးဘို႔ အခက္အခဲ ရွိတဲ့ အတြက္ ဒီ Drawings ေတြ ကို တင္မေပးႏိုင္ေသးပါဘူး။ နီးစပ္ရာ က တစ္ဆင့္ ရယူပါ။)

    • Highlighter (Translucent Marker)တစ္ခု နဲ႔ ဒီ Drawing ေတြ ကိုေလ့လာဘို႔ ေပးထား တဲ့ (ေနာက္ ပိုင္းမွာ တင္ျပထားတဲ့ အတိုင္း) သက္ဆိုင္ရာ ေနရာေတြ ကို ရွာ မ်ဥ္းတားၿပီး ၾကည့္မယ္ ဆိုရင္ ေလ့လာရတာ သက္သာ လြယ္ ကူ ပါလိမ့္မယ္။

    • ေလ့လာ ဘို႔ လိုအပ္တဲ့ အဆင့္ေတြ ကို ေအာက္မွာ ေဖာ္ျပထားပါတယ္။
      1. Classification of Fire Hazard [ LH, OH (1, 2, 3, 3S), HH (Cat 1, 2, 3, 4) ]
      2. System Types [ Wet, Pre-Action, Deluge, Others, ... ]
      3. Design Data [ Design Density of Discharge and Assumed Area of Operation (AMAO) ]
      4. Identify Water Source [ Pump Suction Tank, Gravity Tank, etc. ]
      5. Water Tank Storage Capacity [ Normal Capacity, Reduced Capacity /w Conditions ]
      6. Sprinkler Pumps (Duty, Standby, Jockey) Capacities
      7. Coverage and Spacing of Sprinklers
      8. Special Provisions (Under Beam, Under Duct, Above Concealed Ceiling, Above Open Grid Ceiling, etc.)
      9. Size and Type of Sprinklers
      10. Piping Arrangements (End-Center, End-Side) and Pipe Sizes (Pre-calculated, Partly pre-calculated, Fully hydraulically calculated systems)
      11. Total Number of Alarm (Control) Valves
      12. Maximum area of Zone Protected by Each Alarm Valve


    1. Overall Schematic Drawing

      Overall Schematic Drawing မွာ ရွာေဖြ ၾကည့္ရမွာ ေတြ ကေတာ့။
      1. ပထမ ဆံုး အဆင့္ က Hazard Class ကို ရွာဘို႔ပါ။ ဒါမွ ဆက္ႏြယ္တဲ့ Design Data ေတြ ကို သိရွိမွာ ျဖစ္ပါတယ္။ Hazard Class ကိုေပးတဲ့ အခါ Sprinkler အျမင့္ ကို ပါ ထည့္သြင္း ေပးတတ္ပါတယ္။ ( ဥပမာ။ ။ Ordinary Hazard 3, 30m)
        Hazard Class ကို ျခံဳၿပီး ေပးတာ ရွိႏိုင္သလို ေနရာအလိုက္ ခြဲေပးတာလည္း ရွိႏိုင္ပါတယ္။ ဒီ မွာ မေတြ႕ရင္ ေတာ့ Note, Legends, Abbreviation ေတြပါတဲ့ Drawing မွာ ရွာရမွာ ျဖစ္ပါတယ္။
      2. System Types ကို ေလ့လာပါ။ [ Wet, Pre-Action, Deluge, Others, ... ]
      3. Design Data [ Design Density of Discharge and Assumed Area of Operation (AMAO) ] အထူးသျဖင့္ High Hazard Classes ေတြအတြက္ အေရးႀကီးပါတယ္။ Ordinary Hazard ေတြမွာ ေတာ့ Hazard Class သိရင္ ဒီအခ်က္အလက္ေတြ ကို CP52:2004 ကသက္ဆိုင္ရာ အခန္းမွာ ရွာလို႔ ရပါတယ္။
      4. Water Source [ Pump Suction Tank, Gravity Tank, etc. ] ေရအဝင္ နဲ႔ ေရကန္ေတြ ထားတဲ့ ေနရာ ကိုေလ့လာပါ။ R.L (reduce level) ကိုလည္း ၾကည့္ပါ။
      5. Water Tank Storage Capacity ေရကန္ေတြ ရဲ့ အရြယ္ပမာဏ ကို ရွာပါ။ Normal Capacity (အျပည့္) ျဖစ္ႏိုင္သလို Reduced Capacity (ခြင့္ျပဳခ်က္ အတိုင္း ေလွ်ာ့ခ်ခြင့္ ရွိ တဲ့ ပမာဏ) လည္းျဖစ္ႏိုင္ပါတယ္။
      6. Sprinkler Pumps (Duty, Standby, Jockey) Capacities ေရပန္႔ေတြ ရဲ့ Capacity လိုအပ္ခ်က္ ေတြ ကို ရွာပါ။ (ဒါက လည္း Hazard Class နဲ႔ တိုက္ရိုက္ သက္ဆိုင္ပါတယ္။)
      7. Total Number of Alarm (Control) Valves : Alarm Valves အရည္အတြက္ နဲ႔ ထားတဲ့ ေနရာ ေတြ ကို ေလ့လာပါ။


    2. Notes, Legends & Abbreviations

      Notes, Legends & Abbreviations Drawings ေတြ မွာ ရွာေဖြ ၾကည့္ရမွာ ေတြ ကေတာ့။
      1. Notes
        • သက္ဆိုင္တဲ့၊ သတိထားရမဲ့ မွတ္ခ်က္ ေတြ ကို စီစဥ္ ေပးထားတာပါ။ ေသေသခ်ာခ်ာ ဖတ္ထားဘို႔ လိုအပ္ပါတယ္။

      2. Legends & Abbreviations
        • သံုးထားတဲ့ Symbols ေတြ အတိုေကာက္ေတြ ကို ေပးထားတာပါ။ ဒါေတြ က Drawing ကို နားလည္ ေစဘို႔ အေထာက္အကူ ျပဳမွာ ျဖစ္ပါတယ္။


    3. Floor Plans

      Floor Plansေတြ မွာ ရွာေဖြ ၾကည့္ရမွာ ေတြ ကေတာ့။
      1. Location of Major Components
        1. Sprinkler Tank & Pump Locations
        2. Breeching Inlet Locations
        3. Sprinkler Control Valves Locations
        4. Main Pipe Route

      2. Piping and Sprinkler Arrangements
        1. Which type of Layout (Three End-Center, Two End-Center, Three End-Side, Two End-Side, Center Feed, End Feed, Other, etc…)
        2. Single Layer (or) Double Layer
        3. Sprinkler types and spacing
        4. Any Special Sprinkler Provided


    4. Standard Details

      • Pump Detail, Water Tank Detail, Alarm Valve Detail, Hanger Detail စတဲ့ အေသးစိတ္ ပံုေတြ ကို ေပးထားေလ့ ရွိပါတယ္။ စာဖတ္သူ ပိုၿပီး နားလည္ေစႏိုင္ဘို႔ပါ။


  3. Checking with Code of Practices

    • လိုအပ္တဲ့ Code of Practices ေတြ ကေတာ့ SS CP 52:2004 နဲ႔ SCDF Fire Codes ေတြပါ။
    • SCDF Code ေတြ ကေတာ့ Web ကေန Free Download ရႏိုင္ပါတယ္။
    • Singapore Standard SS CP 52:2004 က အရမ္းတင္းက်ပ္တဲ့ Copyright နဲ႔ ထိန္းထားတာမို႔ စာေရးသူ မွာ ျဖန္႔ေပးပိုင္ခြင့္ မရွိပါဘူး။ စာဖတ္သူ နီးစပ္ရာ ကေန ရွာယူႏိုင္မယ္လို႔ ေမွ်ာ္လင့္ပါတယ္။ CP52: Preview ကို သြားၾကည့္ရင္ ပါဝင္တဲ့ အခန္းေတြ ကို ေတြ႕ရမွာ ျဖစ္ပါတယ္။ 184 pages ရွိတဲ့ ဒီစာအုပ္ရဲ့ ေရာင္းေစ်း က S$140 မို႔ ကိုယ္ပိုင္ဝယ္ဘို႔ ကေတာ့ မသက္သာလွပါဘူး။)
      • CP52: 2004 ပါဝင္တဲ့ Clauses ေတြ ကို အပိုင္း - ၁၃ ပိုင္းခြဲၿပီးေပးထားပါတယ္။
        • 1 Scope
        • 2 Definitions
        • 3 Classes of sprinkler system and design data
        • 4 Installation
        • 5 Water supplies
        • 6 Spacing and location of sprinklers
        • 7 Sprinklers, sprayers and multiple controls
        • 8 Piping
        • 9 Valves and ancillary equipment
        • 10 Light hazard class systems
        • 11 Ordinary hazard class systems
        • 12 High hazard class systems
        • 13 Full hydraulic calculation of sprinkler systems
      • အပိုင္း 1 ကေန 9 အထိက Hazard Classes အားလံုး အတြက္ သက္ဆိုင္ပါတယ္။
        ဒါေပမဲ့ အထူး သတိထားရမွာ က အပိုင္း 10, 11 နဲ႔ 12 ပါ။ Hazard Class အလိုက္ သက္ဆိုင္တဲ့ အခန္းကို ပဲ ၾကည့္ရမွာ ျဖစ္ပါတယ္။
      • လိုအပ္ခ်က္ ေတြ ကို ေယဘုယ် (General) သတ္မွတ္ခ်က္ ေတြ ရွိေပမဲ့ သီးသန္႔ လိုအပ္ခ်က္ေတြ လည္း ရွိႏိုင္ပါတယ္။ ဒါေၾကာင့္မို႔ သက္ဆိုင္ရာ Clauses ေတြ ကို ေသေသခ်ာခ်ာ၊ အထပ္ထပ္ ဖတ္ၾကည့္ဘို႔ လိုအပ္ပါတယ္။ (Read-it, read again, read again, ….)

      • Drawing ေတြ ကို ေလ့လာရင္ စစ္ေဆးရမဲ့ အဆင့္ေတြ ကေတာ့
        1. Check Hazard Class (incl. AMAO and Density of Discharge)
        2. Check Tank Capacity
        3. Check Pumps Capacities
        4. Check Sprinkler Control Valve and Area Served
        5. Check Pipe Sizes
        6. Check Sprinkler Spacing
        7. Check Special Sprinkler Provisions


      1. Check Hazard Class

        • Hazard Class ဖြင့္ဆိုခ်က္ ေတြ ကို CP52: 2004 အခန္း 3: Classes of sprinkler system and design data မွာ ေလ့လာ ႏိုင္ပါတယ္။
        • Future Flexibility အတြက္ Hazard Class ေတြ ကို လိုအပ္တာထက္ ပိုၿပီး ယူတာလည္း ျဖစ္ႏိုင္ပါတယ္။ ဥပမာ High Rise Building မွာ စစခ်င္း Offices ေတြ ပဲ ရွိတာကို OH 1 ယူမဲ့ အစား OH3 ယူထားတာမ်ိဳးပါ။ ဒါက Client ရဲ့ Future Plan နဲ႔လည္း ဆိုင္ပါတယ္။ ငွားမဲ့ Tenant ရဲ့ Occupancy နဲ႕လည္းဆိုင္ပါတယ္။
        • Hazard Classကို အေလးအနက္ ထားၿပီး ေျပာေနရတာ က ေတာ့ အထဲမွာ ျဖစ္ႏိုင္တဲ့ Fire Hazard အေျခအေန၊ အတိုင္းအဆ ကို ခန္႔မွန္း ႏိုင္ဘို႔ ျဖစ္ပါတယ္။ ျဖန္းပက္ရမဲ့ ေရပမာဏ က ၿငိမ္းသတ္ရမဲ့ မီးရဲ့ အတိုင္းအဆ ေပၚမူတည္တာ မို႔ပါ။ Hazard Class ျမင့္လာတာနဲ႔ အတူ Sprinkler တစ္ခုခ်င္းစီ က ထြက္ရမဲ့ ေရပမာဏ ပိုလိုအပ္ လာတာ သာမက Sprinkler အေရအတြက္ လည္း ပိုၿပီး လိုအပ္လာႏိုင္ပါတယ္။ ဒါေၾကာင့္ Hazard Class အလိုက္ Assume Area of Operation (m²) နဲ႔ Density of Discharge (mm/min) ေတြ ကို သတ္မွတ္ ေပးထားတာ ျဖစ္ပါတယ္။
        • လိုအပ္တဲ့ Density of Discharge (mm/min) ကို ရဘို႔ အတြက္ Hazard Class အလိုက္ Sprinkler Spacing သာမက လိုအပ္တဲ့ Flowrate / Sprinkler Head ရဘို႔ အတြက္ Sprinkler K-Factor (or) Orifice Size ေတြ ကိုလည္း သတ္မွတ္ ေပးရတာ ျဖစ္ပါတယ္။


      2. Check Tank Capacity

        • ဒါကလည္း သက္ဆိုင္ရာ Hazard Class နဲ႔ဆိုင္ပါတယ္။
        • Hazard Class တစ္ခု ထက္ပိုပါမယ္ ဆိုရင္ အားလံုးကို ကာမိေစဘို႔ အျမင့္ဆံုး Hazard Class ကို အေျခခံ ၿပီး ရွာရပါမယ္။
        • သက္ဆိုင္ရာ Clauses ေတြ မွာသြားရွာၿပီး ႏိႈင္းယွဥ္ ၾကည့္ႏိုင္ပါမယ္။ (မသက္ဆိုင္ တဲ့ အခန္း ကို မၾကည့္မိဘို႔ သတိထားပါ။)
          • အခန္း 10 : Light hazard class systems
          • အခန္း 11 : Ordinary hazard class systems
          • အခန္း 12 : High hazard class systems

        • ေနာက္ထပ္ သတိထားရမွာ က အခု စကာၤပူ မွာ ခြင့္ျပဳထားတဲ့ Reduce Capacity လို႔ ေခၚတဲ့ ေရကန္ ရဲ့ ေလွာင္ရမဲ့ ပမာဏ ေလွ်ာ့ခ်ခြင့္ ရွိ၊ မရွိ နဲ႔ သက္ဆိုင္တဲ့ ကန္႔သတ္ခ်က္ေတြ ကိုပါ။


      3. Check Pumps Capacities

        • အေပၚက Tank Capacity ကို ရွာသလို ပဲ Hazard Class အျမင့္ဆံုး အတြက္ လိုအပ္တဲ့ Capacity ေတြ ကို သက္ဆိုင္ရာ အပိုင္း (c.l. 10 or 11 or 12) ေတြ က ေနရွာရပါမယ္။
        • ေနာက္တစ္နည္း ကေတာ့ Hazard Classes အားလံုး အတြက္ လိုအပ္ခ်က္ေတြ ကို Table 5 (pg. 48) မွာလည္း ဖတ္ႏိုင္ပါတယ္။ ေအာက္မွာပါတဲ့ Notes (a), (b) & (c) ကို သတိထားပါ။
        • ေနာက္ထပ္ သတိထားရမွာ က Negative Suction (Suction Lift) Pumps ေတြ ကို ခြင့္မျပဳေတာ့ပါဘူး။ ဒါေၾကာင့္ Pump ရဲ့ Impeller Level က အနိမ့္ဆံုး Water Level ထက္ျမင့္ေနလို႔ မရေတာ့ပါဘူး။
        • Pressure Maintenance Pump (Jockey) Pump နဲ႔ ပါတ္သက္ၿပီး သတ္မွတ္ခ်က္ေတြ ကို c.l. 9.6 မွာ ေတြ႔ႏိုင္ပါတယ္။ လက္ခံႏိုင္တဲ့ (တြက္ထားတဲ့) စိမ့္ထြက္မဲ့ ေရပမာဏကို ၁၀ မိနစ္ အတြင္း ျပန္ျဖည့္ႏိုင္ရမယ္။ 4 l/min ထက္ လည္း မေက်ာ္ရဘူးလို႔ ဆိုပါတယ္။


      4. Check Sprinkler Control Valve and Area Served

        • c.l. 3.3.2.2: Wet pipe systems မွာ ဒီသတ္မွတ္ ခ်က္ေတြ ကိုေပးထားပါတယ္။
        • အရင္ Old Code တုန္း ကေတာ့ အေရအတြက္ Number of Sprinklers နဲ႔ သတ္မွတ္ခဲ့တာပါ။ အခု လို Area နဲ႔ ကန္႔သတ္ တဲ့ နည္းကေတာ့ ပိုၿပီး အဆင္ေျပပါတယ္။ Sprinkler Quantity က Coordination အဆင့္မွာ ေျပာင္းႏိုင္တာမို႔ အတိအက် သတ္မွတ္ ႏိုင္ဘို႔ ခက္လို႔ပါ။


      5. Check Pipe Sizes

        • ဒါကိုလည္း Hazard Class အလိုက္ သက္ဆိုင္ရာ အပိုင္း (c.l. 10 or 11 or 12) ေတြ က ေနရွာရပါမယ္။
        • Range Pipe နဲ႔ Distribution Pipe ေသေသခ်ာခ်ာ ခြဲတတ္ဘို႔ လိုပါတယ္။ Site Coordination ရွိေလ့ရွိတာမို႔ Annex B, Figure 29, pg. 175 မွာရွင္းျပထားပါတယ္။ ျဖစ္ႏိုင္ရင္ ေတာ့ Distribution Pipe Size ကိုေရြးတာ ပိုစိတ္ခ်ရပါတယ္။


      6. Check Sprinkler Spacing

        • ဒါကိုလည္း Hazard Class အလိုက္ သက္ဆိုင္ရာ အပိုင္း (c.l. 10 or 11 or 12) ေတြ က ေနရွာရပါမယ္။
        • သတိထားဘို႔ ။ ။သတ္မွတ္ခ်က္ ေတြ ကို ၾကည့္တဲ့ အခါ ေနရာအခ်ိဳ႕မွာ ပိုၿပီးကန္႔သတ္ ထားတာ ေတြ႕ႏိုင္ပါတယ္။ Sprinkler Coverage Ordinary Hazard မွာ ပံုမွန္ သတ္မွတ္ခ်က္ 12m² Max area, 4.2m Max Spacing ဆိုေပမဲ့ အခ်ိဳ႕ေနရာေတြ မွာ 9m² area, 3m Max Spacing လိုအပ္ႏိုင္ပါတယ္။ Light Hazard မွာလည္း ပံုမွန္ သတ္မွတ္ခ်က္ 21m² area, 4.6m Max. Spacing ဆိုေပမဲ့ တစ္ခါတစ္ရံ 12m² area, 4.2m Max. Spacing လိုအပ္ႏိုင္ပါတယ္။
        • c.l. 6.7.3 Suspended Open Grid Ceilings မွာ Gross Opening Ratio > 70%, Net >60% ဆိုရင္ Ceiling Sprinkler မထည့္လို႔ရပါတယ္။ ဒါေပမဲ့ သတ္မွတ္ခ်က္ အရ Above Suspended Ceiling ကို Coverage Area < 9m² နဲ႔ Spacing < 3m ျဖစ္ရမယ္ စတဲ့ ကန္႔သတ္ခ်က္မ်ိဳးေတြပါ။
        • တစ္ခုနဲ႔ တစ္ခုၾကား (< 1.8m) ထက္ ပိုမကပ္ေနဘို႔ သတ္မွတ္ခ်က္ ရွိပါတယ္။ ကပ္ေနရင္ သတ္မွတ္ခ်က္ အတိုင္း Baffle ထည့္ရပါမယ္။


      7. Check Special Sprinkler Provisions

        • သံုးမဲ့ Sprinkler အမ်ိဳးအစား ကို ဆန္းစစ္ရပါမယ္။ ဒါ့အျပင္ Sprinkler ေရထြက္အား ျဖစ္တဲ့ K-Factor နဲ႔ Operation Temperature ေတြ ကိုလည္း သတိထားရပါမယ္။ K-Factor က Hazard Class (or) AMAO ေပၚမူတည္ပါတယ္။ Operation Temperature အတြက္ က ေတာ့ ထူးျခားတဲ့ ေနရာ (e.g. Kitchen, Process ) ေတြ ပါမပါ ဆန္းစစ္ရပါမယ္။
        • သီးသန္႔ စဥ္းစားေပးရမဲ့ အေျခအေန ေတြ၊ ဥပမာ
          • Column နားကပ္ေနရင္။
          • ACMV Duct အႀကီး (> 800 Then check with clauses)
        • ဒီ စပါယ္ရွယ္ ေနရာေတြ အတြက္ လိုအပ္ခ်က္ ဖြင့္ဆို ခ်က္ ေတြ က အပိုင္း 6 မွာ အေသးစိတ္ ပါပါတယ္။ ေတြ႕ရ မ်ားတာေတြ ကေတာ့
          1. Beam and Joists (c.l. 6.4.4)
          2. Columns (c.l. 6.4.5)
          3. Clear Space Below Sprinklers (c.l. 6.4.8)
          4. Concealed Ceiling and Floor Spaces (c.l. 6.6.2)
          5. Suspended Open Grid Ceiling (c.l. 6.7.3)
          6. HVAC Ducts (c.l. 6.7.4) ေတြပါ။


  4. Relation with Other Building Drawings

    • Sprinkler System ေတြ ကို ေလ့လာတဲ့ အခါ ဆက္ႏြယ္တဲ့ အျခား Building Services ေတြ ရဲ့ အက်ိဳးသက္ေရာက္မႈ ကိုလည္း အထိုက္အေလ်ာက္ နားလည္ရပါတယ္။
    1. Structural Drawings

      • Column ေတြ Beam ေတြ က Sprinkler Location နဲ႔ Arrangement လုပ္တဲ့ အခါ ထည့္သြင္း စဥ္းစားရမဲ့ အခ်က္ေတြ ျဖစ္ပါတယ္။ Beam ေတြ Column ေတြ က Sprinkler Operation ကို Obstruct ျဖစ္ႏိုင္တာ မို႔ သင့္ေတာ္တဲ့ Provision ေတြ Sprinkler System Drawing ေတြ မွာ ပါလာႏိုင္ပါတယ္။
      • Tank နဲ႔ Pump ေတြ ရွိတဲ့ ေနရာ မွာ လည္း လံုေလာက္တဲ့ Structural Support ရွိရပါမယ္။

    2. Architectural Drawings

      1. Ceiling အမ်ိဳးအစား [ ဥပမာ - Removable Board Ceiling (e.g. 600x600, 600x1200), Plaster Ceiling, etc.]
      2. Space Designation (Usage) and Floor Areas
      3. Reflective Ceiling Plan (Interior Design)
        1. Space Between Ceiling & Upper Floor Slab
        2. Ceiling Profile
        3. Grid Ceiling
          Interior Design က Ceiling Profile ကို ခုတစ္မ်ိဳး ေတာ္ၾကာတစ္မ်ိဳး လုပ္တတ္ပါတယ္။ Ceiling Profile ေျပာင္းတာ ေလာက္တင္ မဟုတ္ပါဘူး တစ္ခါတစ္ရံ Ceiling မရွိတဲ့ ေနရာ Ceiling ထည့္ခ်င္ထည့္မယ္။ Ceiling ရွိတဲ့ ေနရာမွာ Ceiling မရွိေတာ့ဘူး လုပ္ခ်င္လုပ္မယ္။ Open Grid Ceiling လည္းထားခ်င္ ထားမယ္။ စသည္ျဖင့္ပါ။
          Sprinkler တကယ္ ေနရာခ်တဲ့ အခါ မွာ Ceiling Plan က အဓိက အေရးပါ ပါတယ္။
      4. Partition / Wall
        1. Full Height Slab to Slab
        2. Up to Ceiling Level
        3. 500 mm (or) more Lower than Ceiling
      5. Important Locations
        1. Riser Shaft Locations
        2. FCC (Fire Command Center) Location
        3. Fire Tank & Pump Location
        4. Fire Engine Access Locations

    3. Mechanical & Electrical Drawings

      1. MEP Plant Room Locations
      2. Large Air Duct Locations
      3. Lighting and Air Condition Diffusers


  5. Basic Design Considerations

    • Fire Sprinkler System ေတြ ကို Professional Engineer (QP = Qualified Person) ေတြ ပဲ တာဝန္ယူခြင့္၊ ဒီဇိုင္းလုပ္ခြင့္ ရွိတာမို႔ QP ေတြ ကပဲ စစ္ေဆး လက္မွတ္ ထိုးပါတယ္။ (မွတ္ခ်က္။ ။ စာေရးသူ က စကာၤပူ QP မဟုတ္ပါ။)
    • ဒါေပမဲ့ ဒီဇိုင္း ကိုေတာ့ Designer ေတြ က Support လုပ္ရပါတယ္။ တစ္ခါတစ္ရံ Fire Specialist Contractors ေတြ က လည္း Support လုပ္ႏိုင္ပါတယ္။ ဒီလို Support လုပ္ရတဲ့ အေျခအေန မွာ သံုးႏိုင္ဘို႔ အဆင့္ေတြ ကို ေဖာ္ျပေပးထားပါတယ္။
      1. Determine where Sprinkler System could be exempted (i.e. Area where no sprinkler protection is required)
      2. Determine Hazard Classes and Zones
      3. Determine Tank & Pumps Locations
        Avoid Suction Lift Conditions, otherwise expensive Turbine Pumps will be required.
      4. Determine Storage Tank Material (RC or Steel)
        Check Space Allocation for Tank & Pumps
      5. Determine Locations of Alarm Valves and Breeching Inlets
        Check with Fire Engine Access
      6. Determine Main Pipes Route
      7. Arrange Sprinklers and Piping Network (Also check with Reflective Ceiling Plans...)

    • Client's Insurance Policy နဲ႔ လည္း တိုက္ရိုက္ ပတ္သက္ေလ့ ရွိပါတယ္။ ဒါေၾကာင့္ တစ္ခါတစ္ရံ CP52 သာမက လိုအပ္တဲ့ LPC, NFPA Code ေတြကို ပါ ထည့္သြင္း စဥ္းစား ရႏိုင္ပါေသးတယ္။
    • High Hazard In Storage Rack Sprinkler Protection ပါလာတဲ့ အခါ လိုအပ္တဲ့ Pump Capacity နဲ႔ Tank Capacities က သာမန္ Ordinary Hazard နဲ႔ ယွဥ္ၾကည့္ရင္ အမ်ားႀကီး ပိုႏိုင္ပါတယ္။ ဒါ့အျပင္ Roof (or) Ceiling Sprinkler Protection ပါ လိုအပ္တာမို႔ ဒီအတြက္ ပါထပ္ေဆာင္း ထည့္ေပးရပါေသးတယ္။ သတိထားဘို႔ပါ။


  6. Pictures of Some Major Equipments In Automatic Fire Sprinkler (Wet) Systems

    1. Sprinkler Alarm Valve Assembly


    2. Sprinkler Flow Switch
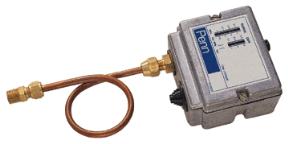


    3. Pressure Switch


    4. Sprinkler Water Storage Tank

      • Galvanized Steel Panel Tank တစ္ခု အတြက္ Panel စတင္ တပ္ဆင္ေနပံု။
      • ၿပီးစီးသြားေသာ Galvanized Steel Panel Tank [For Fire Protection Services]


  7. References

    1. CP 52 : "Code of practice for automatic fire sprinkler system", 2004
    2. SCDF (Singapore Civil Defence Force): Fire Code 2007 Master Version
      [ http://www.scdf.gov.sg/content/scdf_internet/en/building-professionals/publications/fire_code_2007master_version.html ]

    3. SCDF: Fire Code 2002 Handbooks
      [ http://www.scdf.gov.sg/content/scdf_internet/en/building-professionals/publications/fire_code_2002handbooks.html ]


    Web-Links
    1. Singapore Standards eShop
      [ http://www.singaporestandardseshop.sg/Product/Home.aspx ]


    2. CP52: Preview Page[ http://www.singaporestandardseshop.sg/data/ECopyFileStore/060510164343Preview%20-%20CP%2052-2004+Err1.pdf ]

    3. Singapore Civil Defence Force (စကၤာပူ မီးသတ္တပ္ဖြဲ႔)
      1. Publication Website : Singapore Civil Defence Force
        [ http://www.scdf.gov.sg/Building_Professionals/Publications/index.html ]

      2. SCDF (Singapore Civil Defence Force): Fire Code 2007 Master Version
        [ http://www.scdf.gov.sg/content/scdf_internet/en/building-professionals/publications/fire_code_2007master_version.html ]

      3. SCDF: Fire Code 2002 Handbooks
        [ http://www.scdf.gov.sg/content/scdf_internet/en/building-professionals/publications/fire_code_2002handbooks.html ]


    4. Youtube Videos
      1. Toronto Fire Dept-FIRE DEMO-Working Residential Sprinkler
        [ http://www.youtube.com/watch?v=Nlyx8zR7q7M ]

      2. Fire Sprinkler Demonstration[ http://www.youtube.com/watch?v=1NUKYQMxWl4 ]


    5. Manufacturers
      1. Aurora Fire Pumps Website[ http://www.aurorapump.com/html/market_fire.htm ]
      2. Victaulic Company
        [ http://www.victaulic.com/content/firelockautosprinklersfpliterature.htm ]

      3. Victaulic Company : Automatic Sprinkler Product Reference (pdf)
        [ http://www.victaulic.com/docs/lit/40.01.PDF ]

      4. Viking SprinklerSpray Patterns
        [ http://www.vikingcorp.com/databook/sprinklers/spraypatterns/ ]

      5. Steel Recon Industries (SRI) Malaysia Products [ http://www.sri.com.my/products.html ]

    6. Fire Protection Engineering by Morgan Hurley, P.E., SFPE
      [ http://www.wbdg.org/design/dd_fireprotecteng.php ]


Read More... [ အက်ယ္ ဖတ္ရန္... ]

Friday, March 6, 2009

ASHRAE Guide for Buildings in Hot & Humid Climage မိတ္ဆက္။

  • ပူျပင္းၿပီး Humidity မ်ားတဲ့ ရာသီဥတု ရွိတဲ့ ေဒသေတြ က အေဆာက္အအံု ေတြ ကို ဒီဇိုင္း လုပ္တဲ့ အခါ Challenges က ေအးေအာင္ လုပ္ရံုတင္ မဟုတ္ေတာ့ ပါဘူး။ စြတ္စိုထိုင္းမႈိင္းမႈ Humidity နဲ႔အတူကပ္ပါလာတဲ့ ျပႆနာ ေတြ ကို ပါ ထည့္သြင္း စဥ္းစားရပါတယ္။ ဟုိတယ္ခန္း က ေမြ႕ရာေအာက္မွာ ေရဝပ္ေနတာ၊ wall paper ေနာက္မွာ ေရခိုေနတာ၊ မိႈစြဲ ေနတာ၊ ၾကမ္းပိုးထူတာ၊ ေဆြးေျမ႔တာ၊ ေအာက္သက္သက္ အနံ႔ ဆိုးထြက္ေနတာ စတဲ့ ျပႆနာ ေပါင္းစံု ပါ။ အထူးသျဖင့္ အေရွ႕ေတာင္အာရွ ႏိုင္ငံေတြ အတြက္ ဒီ အေၾကာင္းအရာ က အေရးပါ ပါတယ္။
  • စာေရးသူ တို႔ အေနနဲ႔ ဒီ ေဒသေတြ အတြက္ ဒီဇိုင္းလုပ္တဲ့ အခါ humidity ကို အထူး သတိထား ဂရုစိုက္ ရေလ့ရွိပါတယ္။ အထူးသျဖင့္ အတိမ္းအေစာင္း သိပ္မခံ တဲ့ High-Tech Production Factories ေတြ မွာ ပိုၿပီးဂရုစုိက္ ရပါတယ္။ ဒီအေၾကာင္း ကို ေလ့လာလည္း ေလ့လာ အသံုးလည္း ခ် ေနစဥ္ မွာပဲ Seminar တစ္ခု တက္ဘို႔ အခြင့္အေရး ရတာ နဲ႔ သြားတက္ျဖစ္ ခဲ့ပါတယ္။ “New & Existing Buildings in Hot and Humid Climates” ျဖစ္ပါတယ္။ ေဟာေျပာသူ က ေတာ့ ASHRAE president 2006-07 တာဝန္ ယူခဲ့ဘူးသူ Mr. Terry E. Townsend, (P.E., Fellow ASHRAE) ျဖစ္ပါတယ္။
  • မၾကာေသးခင္ က ဒုတိယအႀကိမ္ ျဖည့္စြက္ ရိုက္ႏွိပ္ ထုတ္ေဝတဲ့ The ASHRAE Guide for Buildings in Hot & Humid Climates ကို အေျခခံၿပီး ေဟာေျပာတာ ျဖစ္ပါတယ္။ ေနရာကေတာ့ စကၤာပူ ႏိုင္ငံ BCA Acamedy မွာပါ။ ဒုတိယ ပိုင္းမွာ ေတာ့ NUS က Professor တစ္ေယာက္ျဖစ္တဲ့ Professor S.K. Chou ကေနၿပီး “Enhancement of the Envelope Thermal Transfer Value Criterion for Improved Energy Performance of Buildings” အေၾကာင္းကို ဆက္လက္ ေဟာေျပာပါတယ္။ (ဒီအေၾကာင္းကိုေတာ့ ေနာက္တစ္ပါတ္ မွာ ဆက္လက္ တင္ျပေပးပါမယ္။)
  • ဒီတစ္ပါတ္ မွာ ေတာ့ ဒီလို ပူျပင္းစြတ္စို တဲ့ ရာသီဥတု ရွိတဲ့ ေဒသ က အေဆာက္အအံု အားလံုး အတြက္ အေျခခံ စဥ္းစားရမဲ့ အခ်က္ ေတြ ကို ျခံဳငံု တင္ျပမွာပါ။
  • North America မွာ mold (မိႈတက္တဲ့မိႈ) ကို ေရွ႕ေနေတြ ေပးထားတဲ့ နာမည္ က ေငြ (money) ပါတဲ့။ ဆိုလိုတာ က မိႈတက္တာ ေတြ႕လို႔ ကေတာ့ သူတုိ႔ ဂြင္၊ ေငြတြင္း နဲ႔ တူတဲ့ အမႈေတြ ရမွာ ျဖစ္လို႔ ပါတဲ့။


  1. The ASHRAE Guide for Buildings in Hot & Humid Climates
    • ပထမ အႀကိမ္ရိုက္ႏွိပ္ စဥ္ က စာအုပ္ ကိုေတာ့ ဖတ္ရႈေလ့လာ ဘူးပါတယ္။ လက္ရွိ ဒုတိယ အႀကိမ္ မွာေတာ့ ပထမ အႀကိမ္ ထက္ သံုးဆေလာက္ ပိုထူလာတာ ေတြ႕ရပါတယ္။ ဖတ္ၾကည့္ဘို႔ အခြင့္အေရး ေတာ့ မရေသး ပါဘူး။
    • ဒီစာအုပ္ရဲ့ အညႊန္း keyword ေတြ ကေတာ့ Moisture (အစုိဓာတ္), mold (မိႈတက္), humidity (စိုထိုင္းဆ), dehumidification (စိုထိုင္းဆ ေလွ်ာ့ခ်ျခင္း), sustainability (ေရရွည္တည္တံ့ ႏိုင္မႈ), energy reduction (စြမ္းအင္အသံုး ေလွ်ာ့ခ်ျခင္း) , moisture management (စြမ္းအင္ စီမံခန္႔ခြဲျခင္း), hot and humid climates (ပူျပင္းစြတ္စိုေသာ ရာသီဥတု) ေတြျဖစ္ပါတယ္။


      The expanded second edition of The ASHRAE Guide for Buildings in Hot and Humid Climates triples the size of this popular reference, adding information on building enclosures, dehumidification, sustainability, mold avoidance, energy reduction, and much more—all tightly focused on the needs of owners, architects, and engineers who build and manage buildings in hot and humid climates. The book includes six chapters that discuss critical crosscutting issues for architecture, engineering, and building management along with eleven chapters of detailed and practical solutions to everyday problems in each area. This expanded second edition provides a richly illustrated summary of the state of the art in building science, moisture management, and techniques for reducing energy consumption in hot and humid climates, all based on real-world field experience as well as on recent ASHRAE research. The expanded second edition is written and illustrated by Lew Harriman, the lead author of ASHRAE’s well-known Humidity Control Design Guide, and by Joe Lstiburek, ASHRAE Fellow and the author of the irreverent and popular Building Science column in the ASHRAE Journal.

      Related Products: Humidity Control Design Guide
      Format: Hard cover, 8.5" x 11"
      Keywords: moisture, mold, humidity, dehumidification, sustainability, energy reduction, moisture management, hot and humid climates
      Publisher: ASHRAE
      Year: 2009
      Author: Lewis G. Harriman, III, and Joseph W. Lstiburek
      Number of Pages: 316
      ISBN/ISSN: 978-1-933-742-43-4
      Sponsor: TC 1.12, Moisture Management in Buildings


  2. Lstiburek's Guide to Solving IAQ Problems
    • ဒီေဒသေတြ မွာ ရွိတဲ့ အေဆာက္အအံု ေတြ မွာ ေတြ႕ရေလ့ ရွိတဲ့ အဓိက ျပႆနာ က ေတာ့ IAQ (Indoor Air Quality) လို႔ေခၚတဲ့ အေဆာက္အအံု အတြင္း က ေလရဲ့ သန္႔ရွင္းလတ္ဆတ္မႈ အရည္အေသြး ကို ထိန္းသိမ္းႏိုင္ဘို႔ပါ။ IAQ မေကာင္းလို႔ ျဖစ္လာမဲ့ ျပႆနာ ေတြ ကလည္း အမ်ားႀကီးမို႔ပါ။
    • ဒီ ဒုတိယ အႀကိမ္ စာအုပ္ မွာ ပူးတြဲေရးလာတဲ့ စာေရးသူ အသစ္ Lstiburek က IAQ ျပႆနာေတြ ကို ေျဖရွင္းဘို႔ လမ္းညႊန္ခ်က္ အခ်ိဳ႕ေပးထားပါတယ္။
      1. If it smells it probably is bad
        အနံ႔ရတယ္ ဆိုရင္ေတာ့ အဲဒါမေကာင္းတာ ျဖစ္ႏိုင္ပါတယ္။
      2. Not everything that is bad smells
        အားလံုးက အနံ႔ဆိုးတာ ေတြခ်ည္း မဟုတ္ပါဘူး။ (Carbon monoxide, carbon dioxide, ozone လိုဓာတ္ေငြ႔ေတြ က အနံ႔အသက္ မရွိတဲ့ ဓာတ္ေငြ႔ေတြပါ။)
      3. Vent combustion sources
        မီးေလာင္ေပါက္ကြဲ မႈရွိတဲ့ မီးဖို၊ Dryer, Engine အစရွိတဲ့ combustion sources ေတြ ကေန vent လို႔ေခၚတဲ့ ေလကို အေဆာက္အအံု ျပင္ပကို ထုတ္လႊတ္ ေပးဘို႔။ မဟုတ္ရင္ ေလထဲကို မီးေလာင္ၿပီး ထြက္လာတဲ့ COx, NOx နဲ႔ အျခား Pollutant ေတြ အခန္းထဲ စုလာပါလိမ့္မယ္။
      4. Construct a tight enclosure
        အေဆာက္အအံု ရဲ့ အကာအရံ enclosure ေတြက ေလလံုေနဘို႔ လိုပါတယ္။ ဒါမွ moisture မ်ားတဲ့ အျပင္ ကေလေတြ အထဲ ကို Infiltrate (စိမ့္ဝင္) မလာမွာျဖစ္ပါတယ္။
      5. Keep things form getting wet, hot or exposed to UV. Isolate those that do from occupants.
        အရာဝတၱဳေတြ ကို ေရမထိေအာင္ (မစိုစြတ္ မေနေအာင္)၊ အပူ နဲ႔ UV ေတြ မထိေအာင္ ထားပါ။ ဒါေတြထိမဲ့ အရာဝတၱဳေတြ ကိုေတာ့ လူေတြနဲ႔ သီးသန္႔ ျဖစ္ေအာင္ ခြဲထားပါ။
      6. Control indoor humidity
        အခန္း ထဲမွာ ရွိတဲ့ Humidity ကိုထိန္းပါ။ ဒီ Humidity ဆိုတဲ့ေနရာ မွာ Space Humidity တင္မက Surface Humidity ပါ ထည့္သြင္း စဥ္းစား ေပးရပါမယ္။
      7. Maintain stinky places/ things(eg. Bathrooms, kitchens, elevator shafts & trash chutes) under a negative pressure.
        အနံ႔မေကာင္းတဲ့ ေနရာ၊ ပစၥည္းေတြ ရွိတဲ့ ေနရာ (ေရခ်ိဳးခန္း၊ အိမ္သာ၊ မီးဖိုေခ်ာင္၊ elevator shafts နဲ႔ အမိႈက္ပစ္တဲ့ trash chutes, etc.) ေတြကို မယ္။ (လံုေလာက္တဲ့ Exhaust ေပးျခင္းျဖင့္) negative pressure မွာ အၿမဲရွိေနေအာင္ ထိန္းထားေပးပါ။
      8. Keep things & spaces clean
        ေနရာ နဲ႔ ပစၥည္းေတြ ကို သန္႔သန္႔ရွင္းရွင္း ထားေပးပါ။
      9. Filter for people not just equipment
        စက္ပစၥည္းေတြ ကို သာမဟုတ္ ပဲ လူေတြ အတြက္ လည္း ေလကို သန္႔စင္ ေအာင္ Filter စစ္ေပးပါ။
      10. Ventilate for people, not just the building (Source control ventilation will handle the building)
        အေဆာက္အအံု အတြက္ သာမဟုတ္ပဲ လူေတြ အတြက္ကိုလည္း ventilate (ေလသန္႔သြင္း) ေပးပါ။ အေဆာက္အအံု အတြက္ Source control ventilation က တာဝန္ယူ ပါလိမ့္မယ္။
      11. Don't do stupid things to your building
        သင့္အေဆာက္အအံု အတြက္ မိုက္မဲတဲ့ အျပဳအမူေတြ မလုပ္ပါနဲ႔။


  3. Improving Thermal Comfort
    • ဒီ အပူပိုင္းေဒသ ေတြမွာ Humidity တက္ လာတာနဲ႔ အိုက္စပ္ မႈ က Occupant’s Comfort Level က်ဆင္းလာတာ ကို အဓိကေတြ႕ရပါတယ္။
    • Thermally Comfort ျဖစ္တယ္ဆိုတာ ေအးစိမ့္ေနတာ ကိုဆိုလိုတာ မဟုတ္ပါဘူး။ Thermal Comfort အေၾကာင္းကို အရင္ HVAC Systems: Introduction to Design မွာ တင္ျပခဲ့ ပါတယ္။ ပိုၿပီး အေသးစိတ္ သိခ်င္ရင္ မွီျငမ္းစရာ ကေတာ့ ASHRAE Standard 55: Thermal Environmental Conditions for Human Occupancy ပါ။ Hot & Humid Climate မွာ Thermal Confort ကို ဘယ္လို ပိုေကာင္းေအာင္ လုပ္မလဲ ဆိုတာ ကို အခု ဆက္လက္ တင္ျပမွာ ျဖစ္ပါတယ္။

    1. Key Suggestions
      အဓိက အၾကံေပးခ်က္ ေတြ ကေတာ့
      1. အပူကူးမႈ နည္းေအာင္ ေကာင္းေကာင္း Insulation လုပ္ထားတဲ့ enclosure ေတြကို ဒီဇိုင္းလုပ္ပါ၊ ေဆာက္လုပ္ပါ။ ေန က လာတဲ့ Solar Heat အပူနဲ႔၊ Glare (မ်က္စိ က်ိန္းေစတဲ့ အေရာင္ေတာက္ေတာက္) ေတြ ကို သက္သာရေအာင္ ကို ျပဴတင္းေပါက္ေတြ မွာ exterior shading တပ္ဆင္ေပးပါ။ ျပဴတင္းေပါက္ အားလံုး ( အထူးသျဖင့္ အေနာက္ဘက္ မ်က္ႏွာမူထားတဲ့ ျပဴတင္းေပါက္ေတြ) ရဲ့ အရြယ္အစား ကိုေလွ်ာ့ခ်ပါ။
      2. အခန္းထဲ က အပူခ်ိန္ ကို 23.3°C (74°F) အထက္နဲ႔ 26.1°C (79°F) ေအာက္ ၾကားရေအာင္ ထားပါ။
        ဒီ အပူပိုင္းေဒသ ေတြမွာ Humidity တက္ လာတာနဲ႔ အိုက္စပ္ မႈ က Occupant’s Comfort Level က်ဆင္းလာတာ ကို အဓိက ေတြ႕ရပါတယ္။ ဒါေၾကာင့္
        Indoor Dew Point ကို 12.8°C (55°F) ေအာက္မွာ ရွိေနေအာင္ ထိန္းထား ေပးပါ။
      3. Air Handling systems ေတြကို ေလွ်ာ့သံုးမဲ့ အစား ပိုသံုးပါ။
        ဒါမွ လိုအပ္တဲ့ different/dynamic changing internal heat loads ေတြနဲ႕ အနီးစပ္ဆံုး ကိုက္ညိွေပး ပါလိမ့္မယ္။ ဆိုလိုတာက AHU တစ္လံုးတည္း နဲ႔ ႏွစ္ထပ္ေပးမဲ့ အစား တစ္ထပ္ကို တစ္လံုး ေပးခဲ့ရင္ ပိုေကာင္း ပါလိမ့္မယ္။ ေလကို ပို႔ရတာထက္ ေရ (Chilled Water) ကို ပို႔ရတာ က ပိုလြယ္ၿပီး ပိုလည္း သက္သာပါတယ္။ ဒါ့အျပင္ ပိုုမိုရိုးရွင္းၿပီး operate လုပ္ဘို႔အတြက္ ပိုလည္းသက္သာ၊ ပိုလည္း စိတ္ခ် ရပါလိမ့္မယ္။
        အနည္းဆံုး တစ္ထပ္ ကို AHU တစ္လံုး ေပးပါ။

    2. Thermal Comfort ရဘို႔အတြက္ အေျခခံ အခ်က္မ်ား
      1. Shaded Windows= Improved Comfort & Reduced Glare
        • Radiant Heat ျဖာကူးမႈ နည္းပါးပါတယ္။
        • Glare နည္းလာတာနဲ႔ မ်က္လံုး နဲ႔ မ်က္ႏွာေပၚ ကၾကြက္သား ေတြ တင္းမာ ရႈံ႕တြ တာကို ေလွ်ာ့ခ်ေပး ႏိုင္မွာ ျဖစ္ၿပီး သက္ေတာင့္သက္သာ ရွိတဲ့ အျမင္ကို ပိုေကာင္းေစပါတယ္။
        • Peak Load ကိုလည္း ေလွ်ာ့ခ် ေပးႏိုင္ ပါတယ္။

      2. Less East & West Glass= Better Comfort
        • တိုက္ရိုက္က်လာတဲ့ ေနရဲ့ Solar Load အမ်ားအျပား စုဝင္လာတာ ကို ကာကြယ္ေပးပါလိမ့္မယ္။ အာရွသား အမ်ားစုက မနက္ခင္း ခပ္ေစာေစာ ေန ကိုေတာ့ ႏွစ္သက္ၾကေလ့ ရွိပါတယ္။ ဒါေပမဲ့ ေနျမင့္လာတာ နဲ႔ ဝင္လာမဲ့ အပူ ကလည္း မ်ားလာပါလိမ့္မယ္။
        • Cooling systems ေတြရဲ့ အရြယ္အစား၊ ရႈတ္ေထြးမႈ နဲ႔ Operating cost ကို ေလွ်ာ့ခ် ေပးႏိုင္ ပါတယ္။

      3. Comfort Unlikely in 'Glass Boxes'
        • မွန္ေတြ က well insulated wall ထက္ ၅ ဆ ေလာက္ အပူပို သြင္း ေပးပါတယ္။
        • သက္ေတာင့္သက္သာ မရွိလို႔႔႔ ၿငီးတြား မဲ့ Comfort complaint probability ပိုမ်ားႏိုင္ပါတယ္။
        • Mechanical Systems ေတြ ရဲ့ Construction, Operating and Maintenance Cost ပိုမ်ားပါတယ္။

      4. Tight, Well-constructed Exterior Walls Avoids Sharp Changes in Interior Conditions
        ေလလံုေအာင္ ေသခ်ာ ေဆာက္ထားတဲ့ နံရံေတြက အခန္းထဲက အေျခအေန ကို ရုတ္တရက္ မေျပာင္းလဲ ေစပါဘူး။
        • အခန္းထဲ က အပူခ်ိန္ အေျပာင္းအလဲ နည္းေစ ၿပီး သမမွ်တ ပါတယ္။
        • Infiltration ေလစိမ့္ ဝင္တာ နဲ႔ mold မိႈတက္တဲ့ ျပႆနာ ေတြ ကို ေလွ်ာ့ခ် ႏိုင္ပါတယ္။

      5. High Ceilings and Personal Fans Allow Low-cost Comfort
        • Temperature Stratification ကိုရႏိုင္ပါတယ္။
        • Ideal Ceiling Height = 3.65m
        • Ideal Fan Blade Height = 3.0m

      6. One Fan per Floor = Better Comfort + Simpler Systems
        အနည္းဆံုး တစ္ထပ္ ကို Fan (AHU) တစ္လံုး ထားေပးျခင္း အားျဖင့္ Comfort ကိုပိုေကာင္း ေစၿပီး Systems ေတြ ကိုလည္း ပိုမို ရိုးရွင္း ေစပါတယ္။
        • Occupancy Schedules နဲ႔ Heat Load ေတြ နဲ႔ အကိုက္ညီဆံုး ေပးႏိုင္ပါမယ္။
        • Multiple Area အတြက္ လိုအပ္တဲ့ ေလအေျမာက္အမ်ား ကို ေပးရလို႔ ကုန္က်မဲ့ Energy Cost ကို သက္သာ ေစပါမယ္။

    3. HVAC Systems
      1. လူေတြရဲ့ ဝတ္စားဆင္ယင္ မႈ ကို လိုက္ၿပီး HVAC Design ကိုလုပ္ပါ။
        • Indoor Design ကို 24ºC ထားမဲ့ အစား 26ºC ထားၿပီး Dew point ကိုေတာ့ 12.8°C (55°F) ေအာက္မွာ ရွိေအာင္ လုပ္ပါ။
        • Equipment ေတြရဲ့ Cooling Capacity ကို Multiple-stages အဆင့္ဆင့္ ထားပါ။ (သို႔မဟုတ္) modulating capability ထည့္သြင္းေပးပါ။
        • Supply Air Stream ရဲ့ Noise နဲ႔ Chilling Effect ကို ထည့္သြင္း စဥ္းစားပါ။ Occupant ေတာ္ေတာ္မ်ားမ်ား က (သူတို႔ ကိုယ္တိုင္ Control မလုပ္ႏိုင္ပဲ) သူတို႔ အေပၚ Cold Air Direct Blow လုပ္တာ ကို မႀကိဳက္ၾက တာေၾကာင့္မို႔ပါ။

      2. Dry Ventilation Air Helps Avoid Temperature Swings
        • Dedicated Outside Air System (DOAS) ဆိုတာ က လူေတြ နဲ႔ ေနရာ အလိုက္ လိုအပ္တဲ့ Ventilation Air ကို အျခား AC Equipments ေတြ နဲ႔ မေရာပဲ သီးသန္႔ သန္႔စင္ ပို႔လႊတ္ ေပးတဲ့ စနစ္ ကိုေခၚတာပါ။Dew point ကိုေတာ့ 12.8°C (55°F) ေအာက္မွာ ရေအာင္ Treatment လုပ္ေပးရမွာ ျဖစ္ၿပီး သင့္ေတာ္တဲ့ Filter နဲ႔လည္း ေလကို စစ္ ေပးရပါမယ္။
        • Cooling Equipment ေတြ က လည္း humidity ကိုဖယ္ဘို႔ အေအးဓာတ္ ကို အပို ခ်ပစ္ရမဲ့ အစားSensible Load ကိုပဲ ဂရုစိုက္ ရပါေတာ့မယ္။
        • အခန္းထဲ မွာ မႈိတက္တဲ့ ျပႆနာ ကို ေလ်ာ႔ပါးေစ ႏိုင္တာမို႔ US မွာ Dedicated Outdoor Air Dehumidification System ေတြ က ေရပန္းစား လာပါတယ္။ မိႈ နဲ႔ ဘက္တီးရီးယား ပြားတာ ကို ဟန္႔တားႏိုင္ဘို႔ နဲ႔ လူေတြ ရဲ့ ႏွစ္သိမ့္မႈ ကို ေပးႏိုင္ဘို႔ အတြက္ Federal Buildings ေတြ မွာ Dedicated Ventilation dehumidification equipment ေတြသံုးဘို႔ 2003 ခုႏွစ္ထဲ က ျပဌာန္း ခဲ့ပါတယ္။ ဒီ အေဆာက္အအံု ေတြ မွာ အခန္းထဲ က ေလကို ရံုးသူ၊ ရံုးသား ေတြကေန ထုတ္လႊတ္လာမဲ့ humidity ကို စုတ္ယူ ရင္းနဲ႔ Dew point ကို 12.8°C (55°F) ေအာက္ မွာ ထိန္းထားႏိုင္ဘို႔ အတြက္ အျပင္က O/A ေလကို Dew point 10.0°C (50°F) ေအာက္ ရေအာင္ အၿမဲတမ္း Treatment လုပ္ဘို႔ လိုအပ္ပါတယ္။

      3. Constantly Cold Coil also Dry Air Effectively
        • Cooling Coil or Desiccant Dehumidifier controlled with a humidistat vs thermostat
        • VAV Systems with Constantly Cold Coil အတြက္
          • Supply Air Dew Point is Low enough (12.8°C (55°F))
          • Supply Air Dew Point က သတ္မွတ္ထားတဲ့ Indoor Dew Point ေအာက္မွာ ေရာက္ေနရင္ Coil stays cold ထားရပါမယ္။
          • အေအးလြန္ သြားလို႔ လိုအပ္လာတဲ့ re-heat ကို waste heat (refrig condenser or heat recovery wheel) ကေနယူပါ။

      4. Drier Air Expands the Comfort Range in Mixed Uses
        • လူေတြ ကို ရံဖန္ရံခါ မသက္မသာ ျဖစ္ေစတာ က အပူ ေၾကာင့္မဟုတ္ပဲ Humidity ေၾကာင့္ ျဖစ္ေနတတ္ပါတယ္။ အိုက္စပ္စပ္ ႀကီးျဖစ္ေနတာပါ။ ေလကို ပိုၿပီး ေျခာက္ေသြ႔ေအာင္ လုပ္ျခင္းအားျဖင့္ ဒီလို ဒုကၡ မ်ိဳး ကို ေလ်ာ့ပါးေစပါတယ္။

      5. Capacity Modulation Avoids Sharp Changes Stop Overshooting Desired Conditions
        • Stop Oversizing Cooling Equipment - Size at or under "Peak Load"
          ဒီအေၾကာင္းေၾကာင့္ ပူအိုက္တဲ့ ရာသီဥတု မွာ အေႏြးထည္ ေဆာင္ ဘို႔ အတြက္ ျဖစ္ေစတာပါ။ Peak Load ဆိုတာက Operating hour အခ်ိန္ရဲ့ 99% ေက်ာ္မွာ လိုအပ္တာထက္ ပိုေနပါၿပီ။ ဒါ့အျပင္ Designer က လိုရမယ္ရ ဆိုၿပီး 10-20% လည္း ထပ္ထည့္ ႏိုင္ပါေသးတယ္။ ဒီလို အပိုထည္႔ထားတဲ့ အတြက္ လိုခ်င္တဲ့ temperature ကိုေက်ာ္က်သြားတတ္ တာ ကို ထိန္းဘို႔ မလြယ္ေတာ့ ပါဘူး။ ရလဒ္ အေနနဲ႔ ကေတာ့ အရမ္းပူတာ နဲ႕ အရမ္းေအးတာ ၾကား အလ်င္အျမန္ ေျပာင္းေနတာပါပဲ။
          ဒါေၾကာင့္ သင့္ေတာ္ရံု ပဲ ေရြးခဲ့မယ္ ဆိုရင္ Cost ကို ခ်ေပးႏိုင္ရံု သာမက ပိုၿပီးလည္း comfort ျဖစ္ပါလိမ့္မယ္။
        • Variable-Speed Motors (or) Multiple Stage of equipment Capacity
          အေျပာင္းအလဲျမန္ေစတဲ့ ဖြင့္လိုက္ပိတ္လိုက္ (စက္ေတြကို) လုပ္ရမဲ့ အစား လိုအပ္တဲ့ Capacity ရေအာင္ ညင္ညင္သာသာ ေလး ေျပာင္းေပး၊ ညိွေပး ႏိုင္ပါတယ္။ ဒါက Comfort ကို အမ်ားႀကီး ပိုေကာင္း ေစရံုသာမက ေစ်းလည္းခ်ိဳမဲ့ နည္းလမ္းပါ။
        • Split Cooling Load between several pieces of equipments (vs) One Large Piece /component
          Equipment စက္ႀကီးအႀကီး တစ္ခုအစား အေနေတာ္ေလးေတြ အခ်ိဳ႕ကို ေရြးတဲ့အခါ Load အတက္အက် ကိုလိုက္ၿပီး သင့္ေတာ္သလို လိုက္တင္ေပးပါလိမ့္မယ္။ ဒီနည္းကေတာ့ equipment နဲ႔ ေနရာပိုလိုတာ မို႔ အျခားေရြးစရာေတြ နဲ႔ယွဥ္ရင္ ေစ်းအႀကီးဆံုး most expensive ျဖစ္ၿပီး ကုန္က်စရိတ္ ပိုလာမဲ့ နည္းပါ။ ဒါေပမဲ့ Comfort ကိုပိုေကာင္းေစမယ္။ Energy use လည္း အေတာ္ နည္းသြားမယ္။ ထိန္းသိမ္းစရိတ္ ပိုသက္သာေစမဲ့ အျပင္ ယံုၾကည္စိတ္ခ်ရမႈ (reliability) လည္း ပိုေကာင္းလာမွာ ျဖစ္ပါတယ္။Equipment စက္ႀကီးအႀကီး တစ္ခုအစား အေနေတာ္ေလးေတြ အခ်ိဳ႕ကို ေရြးတဲ့အခါ Load အတက္အက် ကိုလိုက္ၿပီး သင့္ေတာ္သလို လိုက္တင္ေပးပါလိမ့္မယ္။ ဒီနည္းကေတာ့ equipment နဲ႔ ေနရာပိုလိုတာ မို႔ ကုန္က်စရိတ္ ပိုလာမဲ့ နည္းပါ။ ဒါေပမဲ့ Comfort ကိုပိုေကာင္းေစမယ္။ Energy use လည္း အေတာ္ နည္းသြားမယ္။ ထိန္းသိမ္းစရိတ္ ပိုသက္သာေစမဲ့ အျပင္ ယံုၾကည္စိတ္ခ်ရမႈ (reliability) လည္း ပိုေကာင္းလာမွာ ျဖစ္ပါတယ္။
        • Ensure that a component in system responds to a humidstat control of dew point conditions
          Cooling System မွာဘာပဲျဖစ္ေနေန အခန္းထဲ က Humidity ကို 12.8°C (55°F) ေအာက္မွာ ထိန္းထား ႏိုင္ဘို႔ အတြက္ Humidistat ကို respond လုပ္ႏိုင္တဲ့ အစိတ္အပိုင္း တစ္ခု သီးသန္႔ ထည့္ေပးထားဘို႔ လုိအပ္ပါတယ္။ Dedicated humidification equipment မပါခဲ့ရင္ အခန္းထဲ က Heat Load နည္းလာတာ နဲ႔ အမွ် အေအးလြန္တာ ကို ထိန္းရင္း နဲ႔ Humidity က မသက္မသာ ျဖစ္ေလာက္ေအာင္ ျမင့္ တက္လာ ႏိုင္ပါတယ္။

      6. Higher Velocity VAV Diffusers Avoid "Cold Air Dumping" (use with non-sleeping areas)
        • Low velocities cause " Cold Air Columns"
          High Velocity နဲ႔ ေရြးခ်ယ္ထားတဲ့ Loud Diffusers ေတြက အိပ္ခန္းေတြ အတြက္ မသင့္ေတာ္ ေပမဲ့ non-sleeping area ေတြ မွာ Comfort နဲ႔ Productivity အတြက္ ေကာင္းက်ိဳး ေပးႏိုင္ပါတယ္။
          အသံၿငိမ္ ေနေအာင္ ေရြးခ်ယ္ထားတဲ့ Diffusers ေတြမွာ Peak Design Flow ကို အေျခခံ ထား ေလ့ရွိၾကတာ မို႔၊ Low Load Condition မွာ Air Flow က အရမ္းနည္းေန တတ္ပါတယ္။ အဲဒါ က အခန္းထဲ က ေလနဲ႔ သမ Mixed ျဖစ္ ရမဲ့ အစား "Cold Column" ျဖစ္ေစၿပီး Occupant ဆီထိ ေရာက္ႏိုင္တာ မို႔ Comfort ကို ထိခိုက္ေစႏိုင္ပါတယ္။
        • Benefit to having "White Noise" generation
          ရံုးခန္းေတြ၊ ေက်ာင္းေတြ မွာ High Velocity Diffuser က ထြက္လာ တဲ့ အသံေတြ ေၾကာင့္ Low-Level "White Noise" ကိုျဖစ္ေစပါတယ္။ တိတ္ဆိပ္ လြန္း လို႔ သူမ်ားေတြ ေျပာဆိုေန သမွ် အကုန္ ေသခ်ာ ၾကားေနရလို႔ စိတ္ရႈတ္ ေနရမဲ့ အစား ကိုယ့္အလုပ္မွာ ကိုယ္ အာရံု စိုက္လာႏိုင္မဲ့ လူမႈေရး အက်ိဳးေက်းဇူး ကို ေပးပါတယ္။ လံုးဝ တိတ္ဆိပ္ေန တာ က အလုပ္လုပ္ေနတဲ့ ပတ္ဝန္းက်င္ အတြက္ မေကာင္းပါဘူး။


  4. Managing Ventilation Air
    • သင့္ေတာ္တဲ့ Outdoor Air (O/A) ပမာဏ ကို လူေတြ အသက္ရႈ မဲ့ Breathing Zone အထိ ေရာက္ေအာင္ ပို႔ေပးရပါမယ္။ Breathing Zone ဆိုတာ ကေတာ့ လူေတြ ရွိတဲ့ အခန္း ေတြထဲမွာ ၾကမ္းျပင္ အထက္ 3" နဲ႔ 72" ၾကား (75 & 1800mm)၊ နံရံ (သို႔) Fixed air-conditioning equipment ကေန 2 ft. (600mm) ထက္ေဝးတဲ့ ေနရာလို႔ သတ္မွတ္ ပါတယ္။
    • Ventilation Air က သန္႔ရွင္းရမယ္။ ေျခာက္ေသြ႔ရမယ္။ အမိႈက္ နဲ႔ Pollutants ေတြ ကင္းစင္ရပါမယ္။

    1. Key Suggestions
      အဓိက အၾကံေပးခ်က္ေတြ ကေတာ့
      1. Ventilation System ကို ASHRAE Standard 62.1: Ventilation for Acceptable Indoor Air Quality နဲ႔ ASHRAE 62.1 User Manualကို သံုးၿပီး size လုပ္ ေရြးခ်ယ္ပါ။
      2. အျပင္က ေလ (O/A) ရဲ့ Dew point က 12.8°C (55°F) ထက္ပိုေနရင္ Dehumidify (Dry) လုပ္ေပးပါ။
      3. အနည္းဆံုး MERV-8 အဆင့္ရွိတဲ့ Filter နဲ႔ O/A ကို စစ္ေပးပါ။ အေဆာက္အအံု က အမႈန္အမႊား မ်ားတဲ့ ေနရာ မွာ တည္ရွိေနခဲ့ရင္ MERV-11 အဆင့္ရွိတဲ့ Filter နဲ႔ စစ္ေပးပါ။ အိုဇုန္း ပါဝင္ႏႈန္း မ်ားတဲ့ ေလဆိုရင္ေတာ့ Carbon Filter (သို႔) အျခားသင့္ေတာ္ တဲ့ နည္းနဲ႔ အိုဇုန္း ကို စစ္ေပးပါ။
      4. O/A ကို လိုအပ္ တဲ့ ပမာဏ အတို္င္း ရေအာင္ Modulate (ထိန္းညွိ) ေပး ပါ။ Energy Cost ကိုလည္းထိန္း၊ ေလေကာင္းေလသန္႔လည္း ေပးႏိုင္ဘို႔ အတြက္ လူဦးေရ အနည္းအမ်ား ကိုလိုက္ၿပီး Ventilation Amount ကို ေျပာင္းေပးႏိုင္ဘို႔ လိုအပ္ပါတယ္။ ရွိႏိုင္မဲ့ လူဦးေရ ကို ႀကိဳတင္ ခန္႔မွန္းၿပီး Timer နဲ႔ ေျပာင္းတာျဖစ္ျဖစ္၊ CO2 Sensor ထည့္ၿပီး ပဲျဖစ္ျဖစ္၊ Motion sensor နဲ႔ လူရွိမရွိ sense လုပ္ၿပီး ျဖစ္ျဖစ္ လိုအပ္သလို modulate လုပ္ေပး ႏုိင္ပါတယ္။
      5. ျဖစ္ႏိုင္ရင္ အလဟႆ ဆံုးရႈံးသြားမဲ့ Waste Energy ေတြကို Recover လုပ္ပါ။ Cold & dry ျဖစ္ေနတဲ့ exhaust air ေတြ က ေန recover လုပ္ ယူႏိုင္ ပါတယ္။ Sensible Heat ကိုပဲ Recover လုပ္ႏိုင္တဲ့ Heat Exchanger ေတြ ရွိသလို Sensible ေရာ Latent ပါ recover လုပ္ႏိုင္တဲ့ Energy (Enthalpy) Wheel ေတြ လည္း ရွိပါတယ္။

    2. Dehumidification and Air Cleaning
      • Ventilation Air ကို Condition လုပ္ရတာ က ေစ်းႀကီးပါတယ္။ အထူးသျဖင့္ ပူေႏြးစြတ္စုိ တဲ့ ရာသီဥတု ရွိတဲ့ ေဒသေတြ မွာ ပါ။ ဒီေဒသ ေတြ မွာ အခန္းထဲ က Pollutant ေတြ ကို Dilute ျဖစ္ဘို႔ အျပင္ကေလ သြင္းရံု သက္သက္ နဲ႔ ရတာ မဟုတ္ပါဘူး။ သင့္ေတာ္ေအာင္ သန္႔စင္ ၿပီး dry မလုပ္ခဲ့ ရင္ ေကာင္းက်ိဳးထက္ ဆိုးက်ိဳးကို ေတာင္ ပိုျဖစ္ေစ ႏိုင္ပါတယ္။ ဒါေၾကာင့္ အေဆာက္အအံု ပိုင္ရွင္ေတြ အတြက္ အျပင္က ေလကို သန္႔ေအာင္ စစ္ဘို႔၊ ေရေငြ႔ ဖယ္ဘို႔ နဲ႔ Breathing Zone အေရာက္ ပို႔ဘို႔ အတြက္ က ကုန္က်စရိတ္ သက္သာလွတာ မဟုတ္ပါဘူး။
      • ဒီေဒသ ေတြ က အေဆာက္အအံု ေတြ မွာ Ventilation Air က Humidity Load ရဲ့ အခ်ိဳးအစား အေတာ္မ်ားမ်ား ကို ယူထားပါတယ္။ အေဆာက္အအံု အမ်ားစု မွာ Total peak humidity load ရဲ့ 60% ေလာက္ကို ယူထားတာ ပါ။ ဒီ အပူပိုင္းဇုန္ ေတြ မွာ တစ္ႏွစ္လံုး လိုလို humidity ကလည္း မ်ားတတ္ပါတယ္။ ေဆာင္းတြင္း မွာ ေတာင္ အျပင္က ေလရဲ့ Dew point က လိုခ်င္တဲ့ 12.8°C (55°F) ထက္ ပိုေနတတ္ ပါေသးတယ္။
      • ဒါေၾကာင့္ အျငင္းပြားစရာ အေျခအေန ေတြ ကို ျဖစ္ေပၚေစပါတယ္။ ဘယ္ေလာက္ ႏႈန္းနဲ႔ ေပးရမယ္ ဆိုတာ ကို အတိအက် သတ္မွတ္ ဘို႔ ကိစၥ က လည္း HVAC Engineer ေတြ အေတာ္ သည္းညည္းခံ ရတဲ့ အျငင္းပြားမႈ ေတြ ပါ။
      • ဒါေၾကာင့္ ျဖစ္ႏိုင္ရင္ DOAS သံုးဘို႔ တိုက္တြန္းတာပါ။ Federal Buildings ေတြ မွာ Dedicated Ventilation dehumidification equipment ေတြသံုးဘို႔ 2003 နဲ႔ အျပင္က O/A ေလကို Dew point 10.0°C (50°F) ေအာက္ ရေအာင္ အၿမဲတမ္း Treatment လုပ္ဘို႔ လိုအပ္တဲ့ အေၾကင္း အထက္မွာ တင္ျပခဲ့ ပါတယ္။
        Designer အေနနဲ႔ DOAS ကို မသံုးဘူး ဆိုရင္ humidity control က cooling system ထဲမွာ ထည့္သြင္း စဥ္းစားရမဲ့ အခ်က္ ျဖစ္လာပါတယ္။ ဒါက Designer ရဲ့ ေရြးခ်ယ္ မႈ ဆိုခဲ့ ရင္ Cooling systems ကို အျခားပံုမွန္ Cooling systems ေတြ နဲ႔ မတူပဲ ေသခ်ာ ဒီဇိုင္း လုပ္ရပါလိမ့္မယ္။ ေလက Cooling လုပ္ဘို႔ မလိုခဲ့ ရင္ေတာင္ မွ dry လုပ္ေပးႏိုင္တဲ့ စနစ္ မ်ိဳးကို ဒီဇိုင္း လုပ္ရ ပါမယ္။ အခန္းထဲ မွာ Absolute Humidity (or Dew Point Temperature) တက္လာရင္ ထိန္းႏိုင္ဘို႔ က Humidistat ကို respond လုပ္ႏိုင္တဲ့ စနစ္ေတြ ထည့္သြင္းထားဘို႔ လိုအပ္ပါတယ္။ အထူးသျဖင့္ energy saving အတြက္ higher thermostat setting လုပ္ထားတဲ့ အခါ cooling systems သက္သက္ေတြ ပဲ သံုးခဲ့ ရင္ အခန္းထဲ မွာ humidity တက္လာၿပီး မိႈေတြ ပြားလာပါလိမ့္မယ္။
      • ေနာက္တစ္ခု ကေတာ့ အမႈန္အမႊား ေတြ ကိုသင့္ေတာ္ သလို Filter ေတြ သံုးၿပီး စစ္ၿပီး မွ သြင္းဘို႔ ပါ။ Filter ေတြ ရဲ့ Efficiency ကို ASHRAE MERV Rating နဲ႔ ျပႏိုင္ပါတယ္။ အေသးစိတ္ ကို MERV Chart မွာ ေလ့လာပါ။
      • ASHRAE Standard 62.1 က O/A ကို အနည္းဆံုး MERV-8 အဆင့္ရွိတဲ့ Filter နဲ႔ စစ္ေပးဘို႔ တိုက္တြန္း ထားပါတယ္။ အျပင္မွာ ရွိတဲ့ ေလရဲ့ အမႈန္အမႊား ပါဝင္ႏႈန္း ကို လိုက္ၿပီး Commercial Building အမ်ားစု သံုးၾကတာ က MERV-8 နဲ႔ MERV-11 ပါ။ ေဆးရံုလို အေဆာက္အအံု မ်ိဳးမွာ ေတာ့ ရံဖန္ရံခါ Filter အဆင့္ဆင့္ ခံထားရပါတယ္။ ဥပမာ၊ ပထမ အဆင့္ MERV-8 နဲ႔ အမႈန္အႀကီးေတြ ကိုစစ္ ၿပီး အႏၲရာယ္ေပး ႏိုင္တဲ့ အမႈန္ငယ္ ေလးေတြ ကို စစ္ႏိုင္ဘို႔ MERV-13 ကို ဒုတိယ အဆင့္ ခံတာမ်ိဳးပါ။
      • ေျမျပင္ နားမွာ ျဖစ္ေပၚတဲ့ Ground Level Ozone အေၾကာင္းကို အရင္ Clean Air မွာတင္ျပခဲ့ ပါတယ္။ ဒီအိုဇုန္း က မီးခိုးျမဴ smog ကိုျဖစ္ေစတာရယ္၊ လူေတြ ရဲ့ အသက္ရႈလမ္းေၾကာင္း ကို အႀကီး အက်ယ္ ဒုကၡ ေပးႏိုင္တာ ရယ္ ေၾကာင့္ ေလထဲမွာ 0.08ppm (8 hour avg) or 0.12 (1 hour avg) ထက္မေက်ာ္ ေအာင္ ဂရုစိုက္ဘို႔ သတ္မွတ္ပါတယ္။ ဒါေၾကာင့္ ေလထဲမွာ အိုဇုန္း ဒီထက္မ်ားတဲ့ ႏႈန္းနဲ႔ ပါလာရင္ carbon filter နဲ႔ စစ္ေပးရပါတယ္။

    3. Ventilation Rate
      • Ventilation rate နဲ႔ပတ္သက္ၿပီး အသင့္ေတာ္ ဆံုး မွီျငမ္းစရာ ကေတာ့ ASHRAE Standard 62.1: Ventilation for Acceptable Indoor Air Quality ပါ။

      • Ventilation Rates ကို ႏွစ္ပိုင္း ခြဲထား ပါတယ္။ ပထမ တစ္ခု က ရွိေနႏိုင္တဲ့ လူေတြ အတြက္ ျဖစ္ၿပီး ဒုတိယ ကေတာ့ အေဆာက္အအံု (ဥပမာ၊ ေကာ္ေဇာ) က ထြက္လာမဲ့ contaminants အေငြ႔ ေတြ ကို အားေပ်ာ့ စြန္႔ထုတ္ သြားေစ ဘို႔ ျဖစ္ပါတယ္။
        Ventilation Rates= Occupancy+ Area Factors
      • အသံုးမ်ားတဲ့ Occupancy density နဲ႔ လိုအပ္မဲ့ ventilation rate ေတြကို စာရင္းျပဳထားပါတယ္။ စာအုပ္ (သို႔) pdf download ဝယ္မယ္ဆိုရင္ ေစ်းအေတာ္အတန္ ႀကီးေပမဲ့ ဖတ္ရံုသက္သက္ ဆိုရင္ေတာ့ Free Online Preview လုပ္ႏိုင္ပါတယ္။
      • ေပးထားတဲ့ Rate ေတြ က အနည္းဆံုး လိုအပ္ခ်က္ပါ။ LEED® ကေတာ့ လိုအပ္ရင္ ASHRAE 62.1 ထက္ 30% အထိပိုေပးႏိုင္ေအာင္ ဒီဇိုင္းလုပ္ဘို႔ တိုက္တြန္း ထားပါတယ္။
      • အနံ႔နဲ႔ ပတ္သက္လို႔ အေဆာက္အအံု ထဲကို ပထမ ဆံုး ဝင္လာခါစ အေျခအေန မွာ သတိထားမိေကာင္း ထားမိ ေစပါလိမ့္မယ္။ ဒါေပမဲ့ လူေတြရဲ့ သဘာဝ အရ ဝင္လာသူ ထဲက ၈၀% ေလာက္က ၆ မိနစ္ အတြင္း ပတ္ဝန္းက်င္ နဲ႔ ေနသား က်သြား ေလ့ရွိပါတယ္။ ဒါေပမဲ့ အနံ႔က အေရးပါတဲ့ ေနရာေတြ မွာ ေတာ့ လိုအပ္သလို ဒီဇိုင္းလုပ္ဘို႔ လိုအပ္ႏိုင္ပါတယ္။ ဥပမာ။ ။စတိုးဆိုင္ လိုမ်ိဳး၊ Customer က အနံ႔ျပင္းရင္ အထဲဝင္ခ်င္မွ ဝင္ခ်င္မယ္။ ဝင္ရင္ေတာင္ မွ ခပ္ျမန္ျမန္ လိုသေလာက္ နည္းနည္းပါးပါး ပဲ ဝယ္ၿပီး ျပန္ထြက္ သြားခ်င္ သြားမယ္။
      • အေဆာက္အအံု က ေရကုိ ကုန္စင္ေအာင္ စြန္႔ထုတ္ႏိုင္ဘို႔၊ ေရမခိုေစ ႏိုင္ဘို႔ လိုအပ္ပါတယ္။
      • HVAC Maintenance အတြက္ Access က မရွိမျဖစ္ လိုအပ္ပါတယ္။
      • 12.8°C (55°F) Dew Point က 65%RHupper Limit ထက္ပိုၿပီး သင့္ေတာ္ပါတယ္။
      • Commissioning, Documentation & Maintenance ေတြ လည္း မရွိမျဖစ္ လိုအပ္ပါတယ္။ ဒီ Ventilation System ေတြရဲ့ performance စြမ္းေဆာင္ရည္ အျမဲေကာင္းေနေအာင္ လိုအပ္တဲ့ စစ္ေဆး ထိန္းသိမ္းမႈ ရွိ ေနမွ ျဖစ္မွာ မဟုတ္လား။
      • Local Codes: လုိအပ္ခ်က္ ေတြ က လည္း အနည္းဆံုး ေပးရမဲ့ Ventilation rate ကို သတ္မွတ္ထားေလ့ ရွိပါေသးတယ္။ ရံဖန္ရံခါ ဆိုသလို ဒီ rate ႏႈန္းေတြ က ASHRAE 62.1 ထက္ အဆေပါင္းမ်ားစြာ ပိုေကာင္း ပိုႏိုင္ပါေသးတယ္။ ဒါေပမဲ့ မလိုက္နာ လို႔ မရပါဘူး။
        • Singapore: CP 13
        • Malaysia: Uniform Building Bylaw

        တစ္ခု သတိျပဳရမွာ ကေတာ့ ေလကို ေျခာက္ေသြ႔ေအာင္ မလုပ္ပဲ သြင္းခဲ့ ရင္ Mold ျပႆနာ က ရွိေနအံုးမယ္ ဆိုတဲ့ အခ်က္ပါ။ ျဖစ္ႏိုင္ရင္ Energy Recovery လုပ္ႏိုင္ဘို႔ လည္း လိုအပ္ပါတယ္။ Dry and Cold Air ကပဲ Total energy recovery ရႏိုင္တယ္ ဆိုတာ ကိုလည္း သတိျပဳ ရပါလိမ့္မယ္။
      • Ventilation rate နဲ႔ပတ္သက္ၿပီး US မွာ ရံုးခန္း အေဆာက္အအံု Office Buildings ေတြ 510 လံုး ကို ေလ့လာၾကည့္တဲ့ အခါ မွာ အေဆာက္အအံု အမ်ားစု ASHRAE 62 က လိုအပ္တာထက္ အမ်ားႀကီး ပိုေနတာ ကိုေတြ႕ရပါတယ္။

    4. Ventilation System Maintenance
      1. Outdoor Air Filter ေတြကို လစဥ္ အသစ္လဲေပးပါ။
      2. O/A damper ေတြရဲ့ Position နဲ႔ Operation ကို သံုးလတစ္ခါ စစ္ေဆးပါ။
      3. O/A sensor ေတြ ကို ၆ လ တစ္ႀကိမ္ re-calibrate (စံခ်ိန္ကိုက္ေအာင္ မွန္ေအာင္ ခ်ိန္၊ ညွိ) လုပ္ေပးပါ။ Humidity Sensor ေတြ က ရက္သတၱပါတ္ အခ်ိဳ႕အတြင္း မွာတင္ accuracy တိက်မႈ ±5% RH ကေန ±15% RH ေရာက္ေအာင္ ေျပာင္းလဲ သြားႏိုင္ပါတယ္။
      4. Coil, Drain Pans နဲ႔ damp duct interior ေတြကို တစ္ႏွစ္ တစ္ႀကိမ္ သန္႔ရွင္းေရး လုပ္ေပးပါ။


  5. Energy Consumption Reduction
    1. Minimize exterior glazing, install low-e glass and shade it.
      ေနေရာင္ တိုက္ရိုက္ (Direct) (သို႔) သြယ္ဝိုက္ (Diffuse) ဝင္လာႏိုင္တဲ့ မွန္ေတြ ကို ေလွ်ာ့ခ်ပါ။ Heat transfer နည္းတဲ့ low-e glass ကိုသံုးပါ။ အရိပ္ရေအာင္ Shade လုပ္ေပးပါ။
    2. Avoid West facing glazing (အေနာက္ဖက္ မ်က္ႏွာမူတဲ့ မွန္) ေတြ ကို ေရွာင္ပါ။
    3. Design glazing to allow daylighting of perimeter. ေန႔ပိုင္း မွာ perimeter (အျပင္ဘက္ႏွင့္ နီးေသာ အနား ရွိ ေနရာမ်ား) မွာ ေန႔အလင္းေရာင္ ျဖတ္ဝင္လာႏိုင္မဲ့ ပံုစံျဖစ္ေအာင္ glazing ေတြ ကို ဒီဇိုင္းလုပ္ပါ။ (လွ်ပ္စစ္မီးအသံုးေလွ်ာ့ခ် ႏိုင္ဘို႔ ပါ။ ျပဴတင္းေပါက္ ရဲ့ အေပၚဘက္ Shade လုပ္ထားတဲ့ အျမင့္ ေနရာ က အသင့္ေတာ္ ဆံုးပါ။ ေနေရာင္ရဲ့ အပူ ကို လွိမ့္ဝင္ မလာေအာင္ ထိန္းေပးႏိုင္သလို အလင္းေရာင္ ကိုလည္း အတြင္းပိုင္း ပိုေရာက္ေအာင္ ပို႔ေပးႏိုင္ပါတယ္။
    4. Exterior enclosure must be air tight. အျပင္ဘက္ က နံရံေတြ အကာေတြ အားလံုး က ေလလံု ဘို႔ လိုပါတယ္။ ဒါမွ အျပင္က moisture မ်ားတဲ့ ေလစိမ့္ဝင္ လာလို႔ ပိုမို ကုန္က် မဲ့ energy ကို save လုပ္ႏိုင္မွာ ျဖစ္ပါတယ္။
    5. Commissioning building and systems. အေဆာက္အအံု နဲ႔ Systems ေတြရဲ့ Function and performance စြမ္းေဆာင္ရည္ ေတြ ကို စနစ္တက် စစ္ေဆး တာ ကို commissioning လို႔ေခၚပါတယ္။ ဒါမွ design လုပ္ထားတဲ့ အတိုင္း အမွန္တကယ္ အလုပ္ လုပ္မလုပ္ ေသခ်ာ မွာ ျဖစ္ပါတယ္။
    6. Seal all ducts and plenums. Air duct ေတြ Plenum ေတြမွာ ယိုစိမ့္မႈ ေတြ ရွိေနရင္ Energy ဆံုးရႈံးမႈ ရွိပါတယ္။ ဒါေၾကာင့္ ေလမယို ေအာင္ seal လုပ္ေပးရပါမယ္။
    7. Match ventilation to building's occupancy. အထဲမွာ ရွိေနမဲ့ လူေတြရဲ့ အေရအတြက္ နဲ႔ လိုအပ္ခ်က္ ကို လိုက္ၿပီး ventilation ကိုေပးပါ။
    8. Capture & re-use heat from cooling equipment & exhaust air. မသံုးရင္ အလဟႆ ျဖစ္သြားမဲ့ heat ေတြ၊ Cold & dry exhaust ေတြ က ေန Energy ကို ဖမ္းယူၿပီး ျပန္သံုးစြဲ ပါ။
    9. Control indoor dew point temperature. အခန္းထဲ က Dew point temperature ကို ထိန္းထားပါ။
    10. Provide ongoing-commissioning of systems. အေဆာက္အအံု လည္ပတ္ေနဆဲ မွာ လည္း systems ေတြ ကို ongoing-commissioning (ထိန္းသိမ္း စစ္ေဆး ျပဳျပင္) လုပ္ေပးပါ။

    Energy Efficiency အတြက္ လက္ရွိ အေကာင္းဆံုး မွီျငမ္းစရာ ကေတာ့ ASHRAE 90.1 ပါ။ သူ႕ကိုလည္း Free Preview တစ္အုပ္လံုး သြား ဖတ္ႏိုင္ပါတယ္။ ASHRAE Publications [http://www.ashrae.org/publications/page/1285] ကိုသြားၿပီး Preview Popular ASHRAE Standards ကိုရွာပါ။


    စာဖတ္သူ အေန နဲ႔ ဒီ့ထက္ ပိုၿပီး ေလးေလးနက္နက္ သိခ်င္ရင္ ေတာ့၊ ဝယ္ယူဖတ္ရႈ ပါ (ဒါမွမဟုတ္) ကုမၸဏီ ကို ဝယ္ခိုင္း ပါလို႔။

    For Further Readings
    1. High Performing Buildings
      • ASHRAE က ကမကထ ျပဳၿပီး သံုးလတစ္ႀကိမ္ ထုတ္ေဝေန တဲ့ မဂၢဇင္း ပါ။ နည္းပညာ အသစ္ေတြ နဲ႔ Energy-efficient design and Operation ေတြ ရဲ့ အက်ိဳးေက်းဇူး ကို Decision maker ေတြ နဲ႔ Building community ေတြ သိရွိနားလည္ေအာင္ ေလ့လာႏိုင္ေအာင္ အေထာက္အပံ့ ျဖစ္ေစဘို႔ ရည္မွန္းပါတယ္။ Sustainability movement ထဲ က စံျပ အေဆာက္အအံု ေတြ ကို ေလ့လာ တင္ျပထားတာ ျဖစ္ပါတယ္။
        ASHRAE Website မွာ ပိုက္ဆံေပးစရာ မလိုပဲ အလကား (Free) Download လုပ္ယူၿပီး ဖတ္ရႈႏိုင္ပါတယ္။


    2. Advanced Energy Design Guides Free Download
      • Building Energy အသံုး ကို ေလွ်ာ့ခ်ႏိုင္ ဘို႔ Advanced Energy Guide Series ကို ထုတ္ထားပါတယ္။ လူေတြ ဆီ ေရာက္ေလ ေကာင္းေလ မို႔ ASHRAE Website မွာ ပိုက္ဆံေပးစရာ မလိုပဲ အလကား (Free) Download လုပ္ယူႏိုင္ပါတယ္။ အခုလက္ရွိ ထုတ္ေဝၿပီးတာကေတာ့
        • Small Offices
        • Small Retail
        • Warehouses
        • K-12 Schools

        ေနာက္ဆက္လက္ထုတ္ေဝ ဘို႔ ျပင္ဆင္ေနတာ ေတြ ကေတာ့
        • Highway Lodging
        • Healthcare Facilities

      Small Warehouses and Self-Storage Buildings
      For warehouses up to 50,000 ft2 and self-storage buildings that use unitary heating and air-conditioning equipment, which represent a significant amount of commercial warehouse space in the U.S.
      I-P units.
      K-12 School Buildings
      For elementary, middle, and high school buildings, which have a wide variety of heating and air-conditioning requirements. Options for daylighting, an important component in schools, are included.
      I-P units.
      Small Retail Buildings
      For retail buildings up to 20,000 ft2, the bulk of retail space in the U.S. Addresses typical uses: retail (other than shopping malls); strip shopping centers; automobile dealers; building material, garden supply, and hardware stores; department stores; drugstores; equipment and home furnishing stores; liquor stores; and wholesale goods (except food).
      I-P units.
      Small Office Buildings
      For office buildings up to 20,000 ft2 the bulk of office space in the U.S.; and provides benefits and savings for the building owner while maintaining quality and functionality of the office space. Awards: USGBC 2005 Leadership Award; Stars of Energy Efficiency Award, Honorable Mention (Alliance to Save Energy); and Best Sustainable Practice Award, Honorable Mention (SBIC).
      I-P units.


    3. ASHRAE Publications
      • ASHRAE Publications [http://www.ashrae.org/publications/page/1285] ကိုသြားၿပီး Preview Popular ASHRAE Standards ကိုရွာၿပီး ေလ့လာပါ။
      • ASHRAE Online Learning က Short Courses ထဲ မွာ ASHRAE 55 ကေနထုတ္ႏုတ္ ထားတဲ့ HVAC Systems: Thermal Comfort (I-P) ကုိ Free ေပးထားပါတယ္။ ပိုက္ဆံ ေပးစရာ မလိုပဲ Free ေလ့လာႏိုင္ပါတယ္။


Web-Links

  1. HVAC Systems: Introduction to Design
    [ http://chawlwin.blogspot.com/2008/10/hvac01design.html ]

  2. ASHRAE Standard 55: Thermal Environmental Conditions for Human Occupancy
    [ http://www.ashrae.org/publications/ ]

  3. ASHRAE Online Learning : Look for Short Courses: HVAC Systems: Thermal Comfort (I-P)
    [ http://www.ashrae-elearning.org/catalog.php ]

  4. ASHRAE Standard 62.1: Ventilation for Acceptable Indoor Air Quality
    [ http://openpub.realread.com/rrserver/browser?title=/ASHRAE_1/ashrae_62_1_2007_1280 ]

  5. ASHRAE MERV Rating
    [ http://en.wikipedia.org/wiki/Minimum_Efficiency_Reporting_Value ]

  6. MERV Chart[ http://www.pureairsystems.com/103_2.html ]
  7. Clean Air [ http://chawlwin.blogspot.com/2009/01/clean-air.html ]
  8. Free Preview [ http://www.ashrae.org/publications/page/1285 ]
  9. High Performing Buildings [ http://www.hpbmagazine.org/ ]
  10. Advanced Energy Design Guides Free Download
    [ http://www.ashrae.org/publications/page/1604 ]


Read More... [ အက်ယ္ ဖတ္ရန္... ]